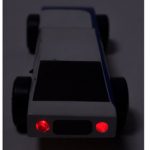
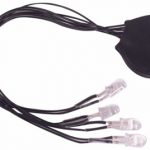
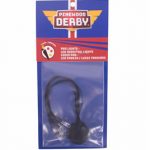

Pro Lights LED Head/Tail Lights for Pinewood Derby cars are easy to install, fully assembled LED light kit that features 2 white headlights and 2 red tail lights (LED’s appear clear until turned on).
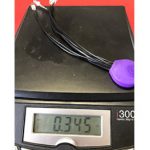
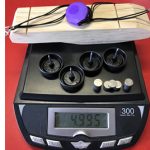
This kit installs easily and only requires a drill and 1 1/8″ paddle or forstner bit and comes with an adhesive vinyl protective cover to insure everything stays safely in place during the rigors of racing. Total weight of the kit is only 0.3oz. so proper weighting of your derby racer can still be achieved for maximum performance along with flashy looks.
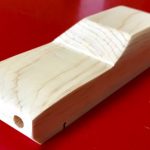
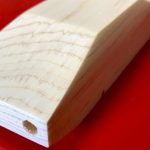
- Select a design for your racer that accommodates head/tail lights. Designs that are more car like with a flat area on the front and rear are easiest to work with as you will be drilling intersecting holes (from the bottom and the front & rear) so designs with roof lines work well.
- Trace or draw your design on the body block and mark your light locations front and rear.
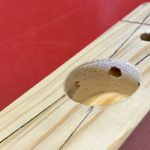
- Locate the center of the body block from the bottom and mark it.
- On the bottom of the car, draw a guide line from each light location to the center mark.
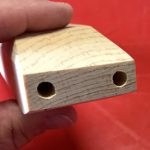
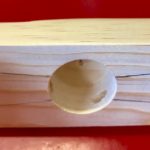
- Place the block in a vice, using a drill and either a 1 1/8″ paddle bit or forstner but (available at any hardware store) drill the hole for the module deep enough to intersect with the LED lights.
- Next, using a 3/16″ drill bit, carefully drill a starter hole from the light locations, following the guide lines on the bottom of the car into the 1 1/8″ module hole. Do this for all 4 locations making sure all 4 holes go completely into the module hole.
- Using a ¼” drill bit, drill the 4 LED light holes their final size making sure the bit reached the module hole for proper sizing. ***Caution, when using a drill, always wear safety glasses and use adult supervision**
- NOW, cut, sand, paint and decorate your car to the desired design.
- Remove battery shipping tab and test lights. on/off button is indicated by the symbol on the case.
- Separate the light leads and carefully thread them into their desired location, pulling them out about 1″. Then carefully apply a drop of super glue and then install them into their desired location in the hole.
- After the glue sets, coil up the excess wire in the module hole and carefully press the module in. The tension from the rubber case will hold it in place.
- Replacement Battery: Lithium CR 2032
Enjoy Your New Lighting System!
Product Videos
Additional Information
- Retail: $9.95
- Sku #: 648094
- BSA UPC: 730176740447
- BSA Part #: 648093